How to Polish Shoes the Right Way
Essential Tools and Preparations for Shoe Polishing
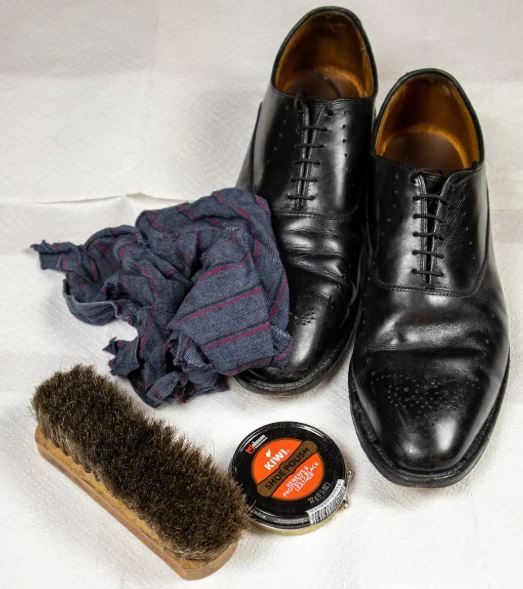
Before diving into the shoe polishing process, it’s crucial to gather all necessary tools and set up a proper workspace. With the right equipment and a bit of organization, you’ll ensure the task is both effective and mess-free.
Start by selecting a suitable polish. These come in different types including creams, waxes, and liquids. Waxes offer more protection and give a strong shine, while creams nourish the leather and help restore color. Liquids provide a fast finish but tend to wear off quicker. Choose a color that matches your shoes or opt for a neutral one that works with any shade.
When it comes to applying the polish, you can use either a soft cloth or a bristle applicator. A clean, worn-out cotton shirt or towel works perfectly if you don’t have a brush. Additionally, for tighter corners and seams, an old toothbrush or cotton swab is helpful.
One essential item that no polishing routine should skip is a horsehair brush. Its soft bristles are ideal for removing loose polish and for buffing the leather to a smooth finish. For the final touch, a chamois cloth or any soft, lint-free material will help in creating that desired glossy effect.
Since shoe polishing can get messy, cover your surface with newspaper, scrap paper, or even a plastic sheet. This prevents unwanted stains on furniture or floors and keeps the cleanup hassle-free.
Preparing the Footwear for Polish
Before applying any polish, it’s essential to clean the shoes thoroughly. This ensures you’re not sealing in dirt or debris which can damage the leather over time.
Remove the shoelaces if your shoes have them. This gives you easier access to the tongue and prevents the laces from getting stained. Use a dry brush to wipe away surface dirt. For more stubborn grime, lightly dampen a cloth and wipe down the shoe, then let it dry completely.
In cases where shoes need a deeper clean, use a mild solution of saddle soap or diluted baby shampoo. Avoid saturating the shoe—just gently scrub, wipe with a clean damp cloth, and let the shoe air dry fully.
Applying the Polish Like a Pro
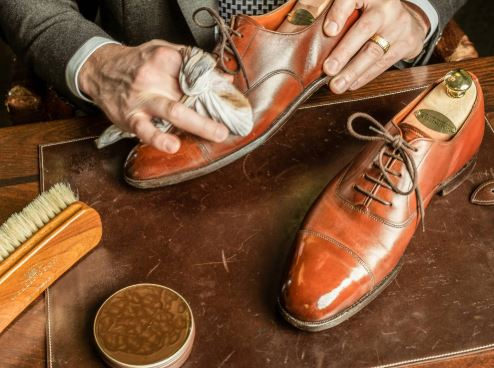
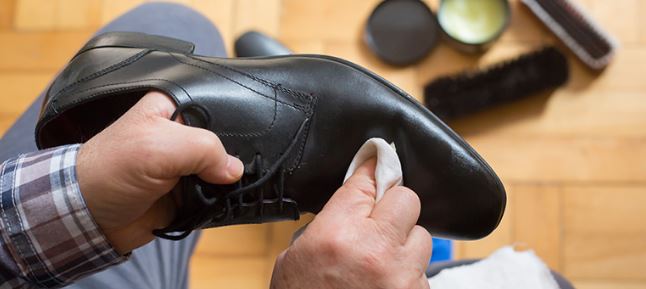
With clean shoes and tools ready, begin applying polish using small, circular movements. Wrap a cloth around two fingers, dip it into the polish, and massage it into the leather. Concentrate on the toes, heels, and other high-contact areas.
Avoid slathering on too much polish at once. A thin, even layer will bond better with the leather. You can always build up the shine with multiple applications. Use a cotton swab or small brush to work the polish into seams and tight spots that larger applicators can’t reach.
After one shoe is coated, set it aside and move on to the second. Let both shoes rest for around 15–20 minutes. This drying period allows the polish to soak into the leather, enhancing its conditioning effect.
If after drying the shoes still look dull or uneven, feel free to add a second coat. Just make sure each layer is thin and given enough time to dry.
Brushing and Enhancing the Shine
Once the polish has had time to settle, grab your horsehair brush. Brush the shoes using short, snappy motions, focusing on generating friction that will warm the polish and help it integrate into the leather. This step not only removes any excess product but also begins the buffing process.
The best technique involves quick wrist movements rather than swinging the entire arm. This allows for better control and helps achieve a consistent finish across the entire shoe surface.
If a subtle glow is all you want, you can stop here. But for those aiming for a mirror shine, there’s more you can do.
Advanced Shining Methods
To elevate the shine, begin by using a soft cloth. Place the shoe on your foot or a shoetree for support. Grip each end of the cloth in your hands and swipe briskly across the surface in a back-and-forth motion.
Another method for achieving a high-gloss shine is spit-shining. Apply a very light mist of water over the first dried layer of polish, then rub it in with your cloth. Add a bit more polish, dampen the cloth slightly, and continue to apply in tiny circles. Repeat the process until you reach the desired shine, always allowing each layer to dry before applying another.
For a dramatic finish, some experienced polishers use fire-shining. In this method, a small amount of polish is briefly heated with a lighter until it melts into a soft liquid. This warm polish is then applied to the leather. Some even use the lighter afterward to gently warm the polished surface, being extremely careful not to scorch the leather. Always keep the flame moving to avoid damage, and never let it contact the shoe directly.
Once this process is complete, add one final polish layer and buff it using a clean, dry cloth.
Extra Tips for Success
- New leather shoes benefit from an initial polish to protect them before first use.
- If your shoes get scratched, melt a small bit of polish and apply it directly to the mark. Layer, dry, and buff gently.
- Build the polish in stages rather than applying thick layers all at once. This “thin over thin” method yields a better finish and is easier to manage.
- Always remove the laces before polishing to avoid stains and allow access to the tongue.
- Use gloves during the process, as wax-based polishes can be tough to wash off skin.
Important Cautions
Be very cautious if using a lighter or any open flame during the fire-shine method. Never allow flames to touch the leather. This technique should only be attempted with experience and in a well-ventilated space, away from flammable materials.
FAQs about Polishing Shoes
What type of polish should I use?
Choose between wax, cream, or liquid polish based on your needs. Wax offers strong shine and protection, cream nourishes and restores color, and liquid provides a quick finish but wears off faster.
Why is it important to clean shoes before polishing?
Cleaning removes dirt and debris that can scratch the leather or get trapped under the polish, ensuring a smoother, longer-lasting finish.
Can I use household items for polishing?
Yes, old cotton t-shirts, toothbrushes, and even cotton swabs can be used effectively for applying and detailing polish.
How long should I let the polish dry?
Each coat of polish should dry for 15 to 20 minutes before brushing or applying additional layers.
What’s the purpose of a horsehair brush?
A horsehair brush helps remove excess polish and buffs the leather to a smooth, even finish through gentle friction.
How can I achieve a high-gloss shine?
Use a soft cloth to buff the shoes briskly, or try the spit-shine method by lightly misting water onto the polish between thin layers.
Is fire-shining safe?
Fire-shining can be effective but carries risks. Use extreme caution, never let the flame touch the leather, and keep it moving to avoid burns.
How do I remove old polish from leather shoes?
Apply a small amount of acetone or rubbing alcohol with a cloth to strip old polish, and follow up with a leather conditioner.
Should I polish brand new shoes?
Yes, polishing new shoes helps protect the leather from the start and improves their appearance and longevity.